Help › Installing Standby
Install the Standby stack
Step by step, with screenshots: choose the region, find your instance ID, fill in the stack and check it worked.
About 10 minutes. You need to sign in to the AWS account that holds your Amazon Connect instance, as someone who can create CloudFormation stacks and IAM roles. You also need the install link from Contact-IQ, which works once and expires after 48 hours unless we agreed otherwise.
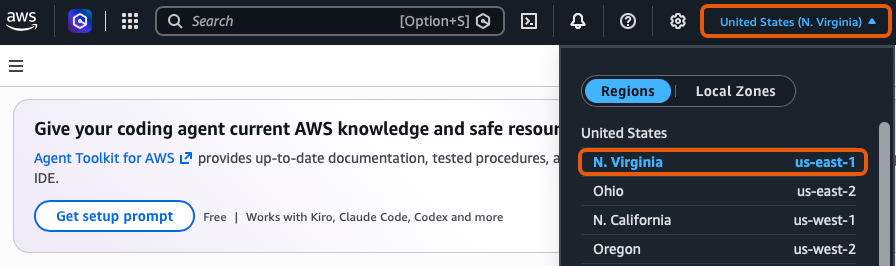
1. Choose the right region
-
Sign in to the AWS console. At the top right, open the region menu and choose the region your Amazon Connect instance is in. Standby supports both US East (N. Virginia) us-east-1 and US West (Oregon) us-west-2.
Standby is installed in the same region as your instance. The most common install problem is a stack created in the wrong one.
2. Find your instance ID
-
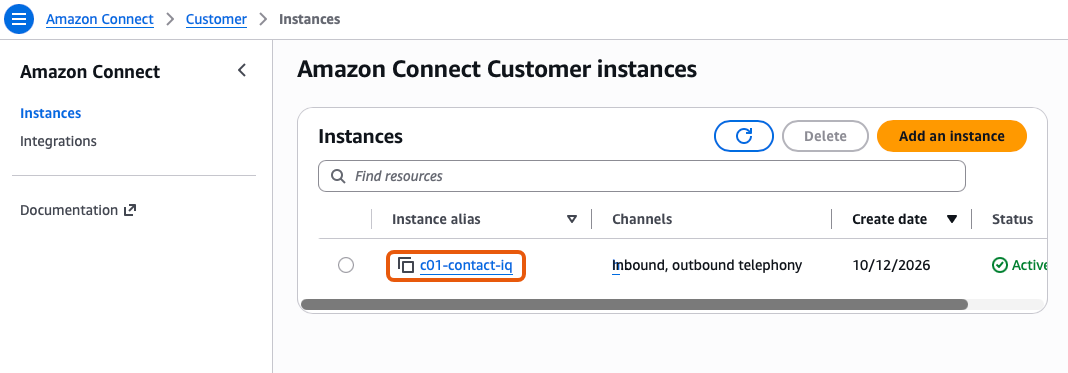
In the console's search bar, type Amazon Connect and open it. Choose Customer, then Instances, and choose your instance's alias.
-
On the instance's Overview, find Instance ARN under Distribution settings. Your instance ID is the last part, the 36 characters after
instance/, for examplea1b2c3d4-5678-90ab-cdef-EXAMPLE11111. Copy just that part, not the whole ARN.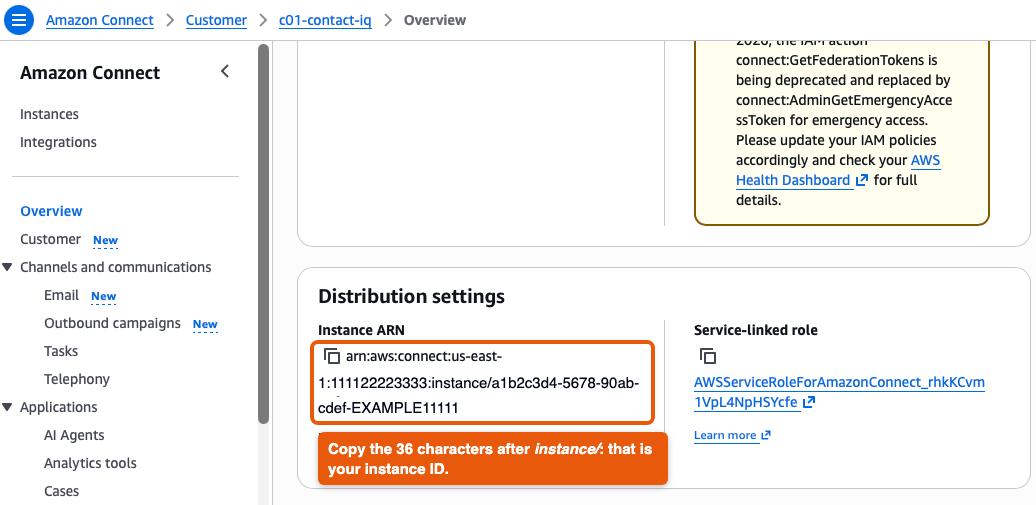
3. Fill in the stack
-
Open the install link from Contact-IQ in the same browser. CloudFormation opens on Quick create stack, with the template and the stack name
standbyalready filled in. Check the region at the top right is still the right one.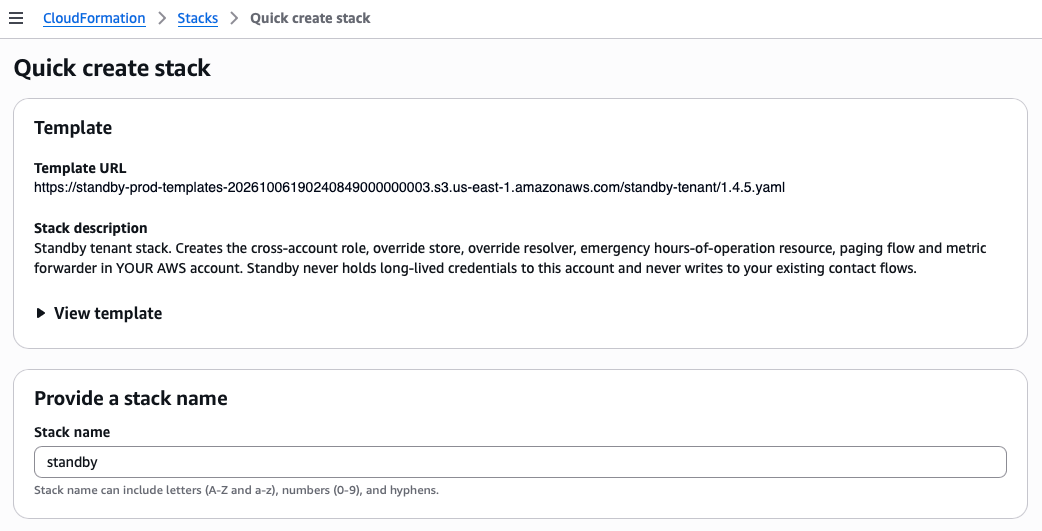
-
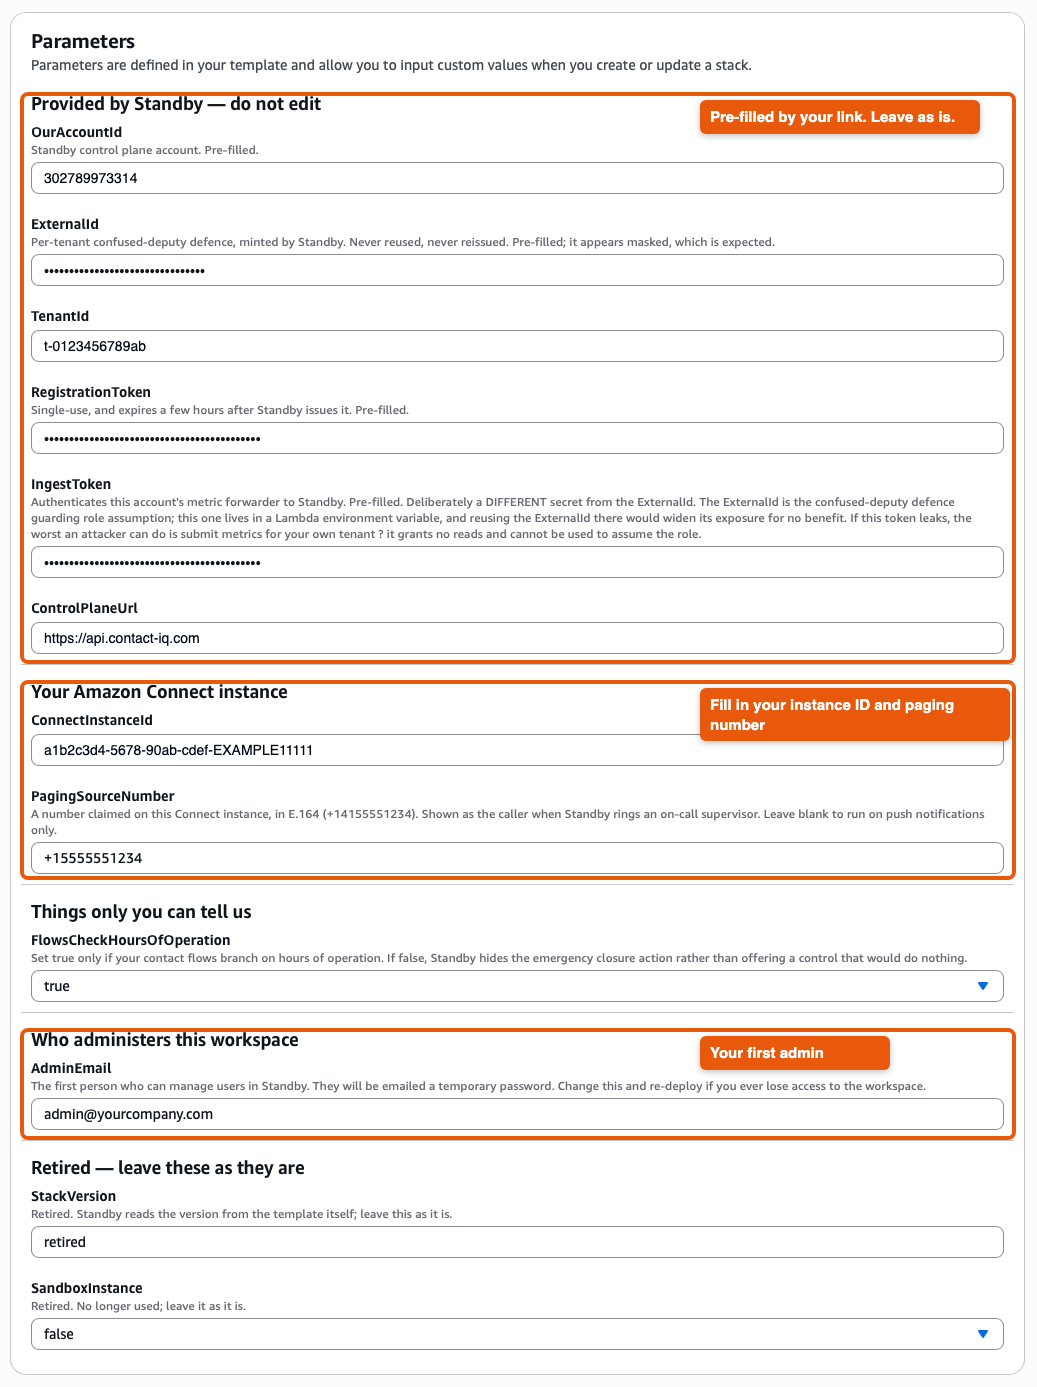
Under Parameters:
- Provided by Standby — do not edit: leave these as they are. Three of them appear as dots, which is expected.
- ConnectInstanceId: paste the instance ID from section 2.
- PagingSourceNumber: the number Standby rings your on-call people from, in E.164 form, such as
+14155551234. It has to be a number claimed on this instance. Leave it blank to page by notification only; you can add it later by updating the stack. - FlowsCheckHoursOfOperation:
trueonly once you've checked your flows as described in Check two branches in your contact flows. While it'sfalse, the "close a queue" action isn't offered. - AdminEmail: the first person who can manage Standby. They're emailed a temporary password. Keep this current: changing it and updating the stack is how you recover the workspace if your admins ever lose access.
- Retired — leave these as they are: only on stacks before 1.4.7 (as in the screenshot). Leave them alone.
-
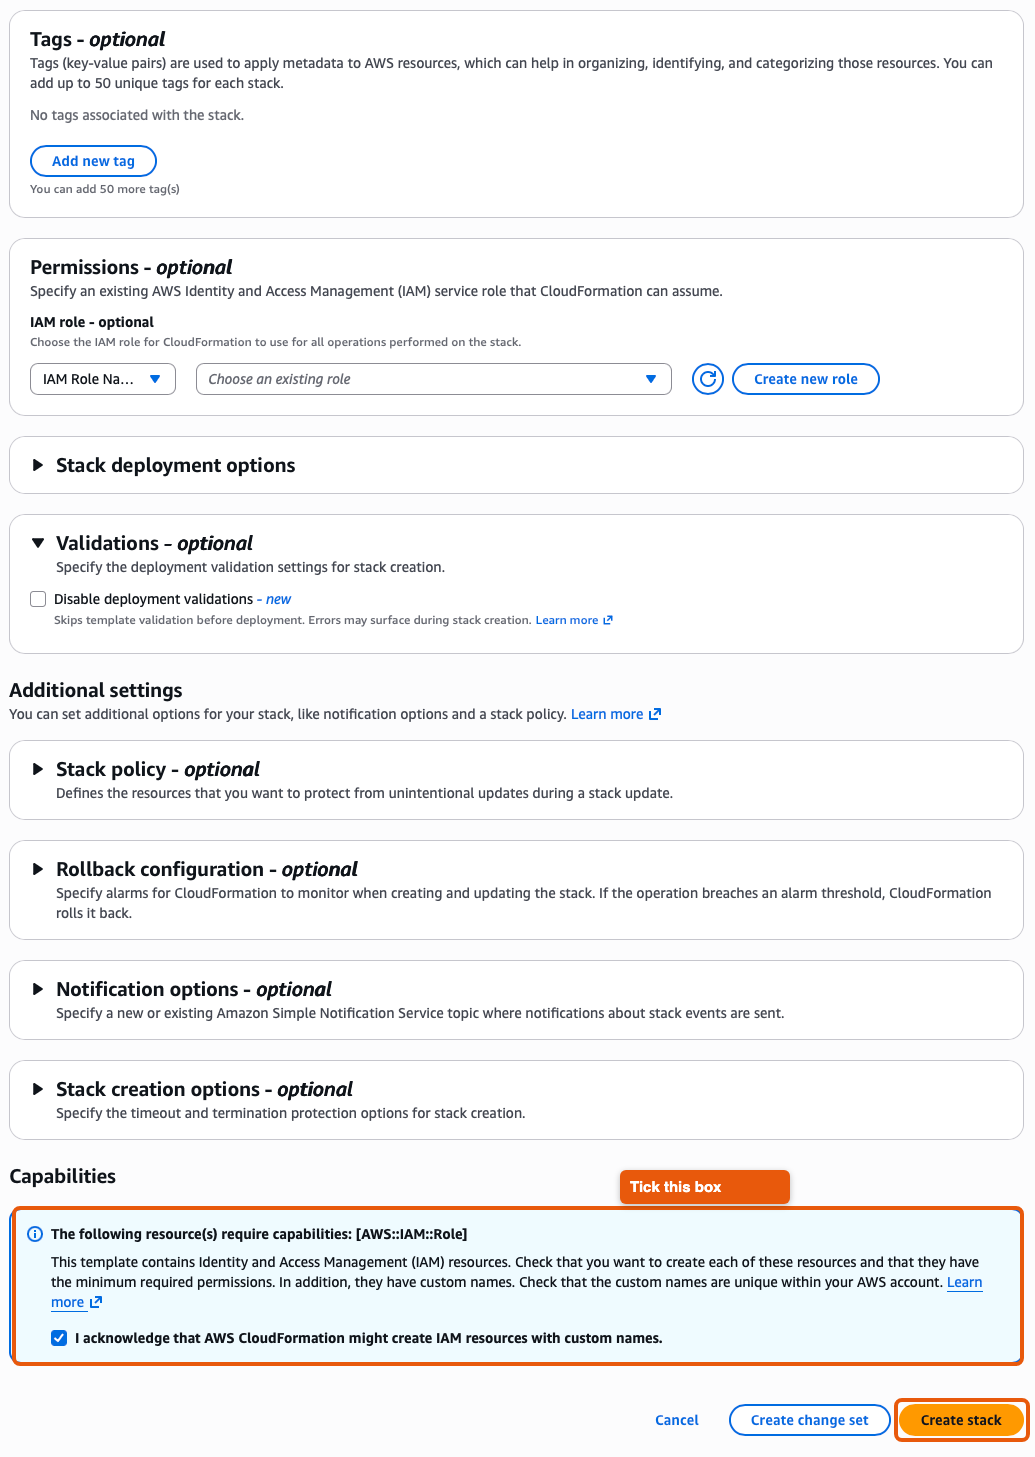
Scroll to the bottom. Leave the optional sections as they are. Under Capabilities, tick I acknowledge that AWS CloudFormation might create IAM resources with custom names, then choose Create stack.
4. Check it worked
-
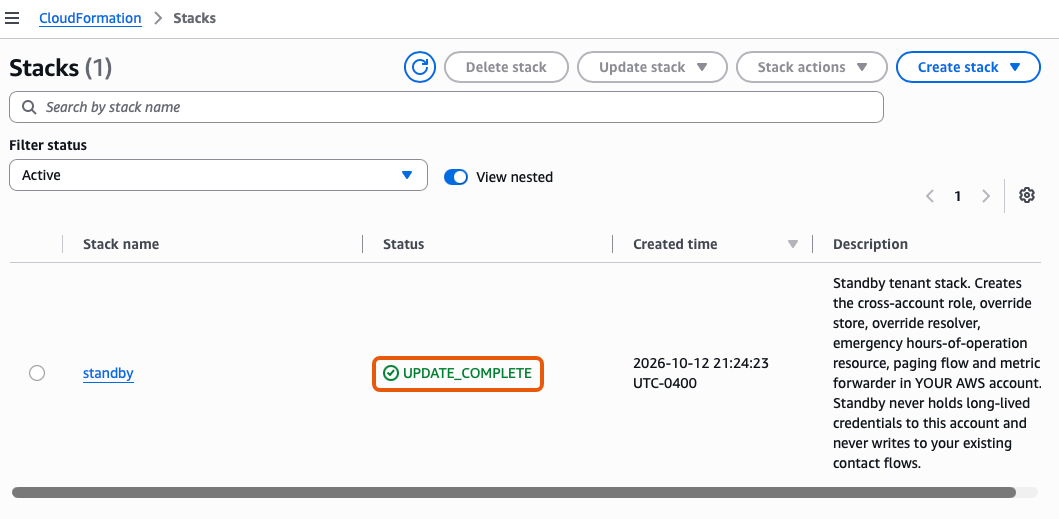
CloudFormation shows the stack's progress. It takes a few minutes. Near the end it registers with Standby and checks it can read your instance. When it's done, the status says CREATE_COMPLETE. After a later update, it says UPDATE_COMPLETE, as here.
If it rolls back instead, open the Events tab: the first failure says why, in plain words. Two you might see:
- "Could not assume the role or read the instance…": usually the instance ID or the region is wrong. Delete the rolled-back stack, and email support@contact-iq.com for a new install link; each link works once.
- "This Amazon Connect instance is already connected to a Standby workspace…": somebody in your organization already uses Standby on this instance, and the message names their workspace. Ask that workspace's admin to invite you. Your link still works, if you meant to install on a different instance.
-
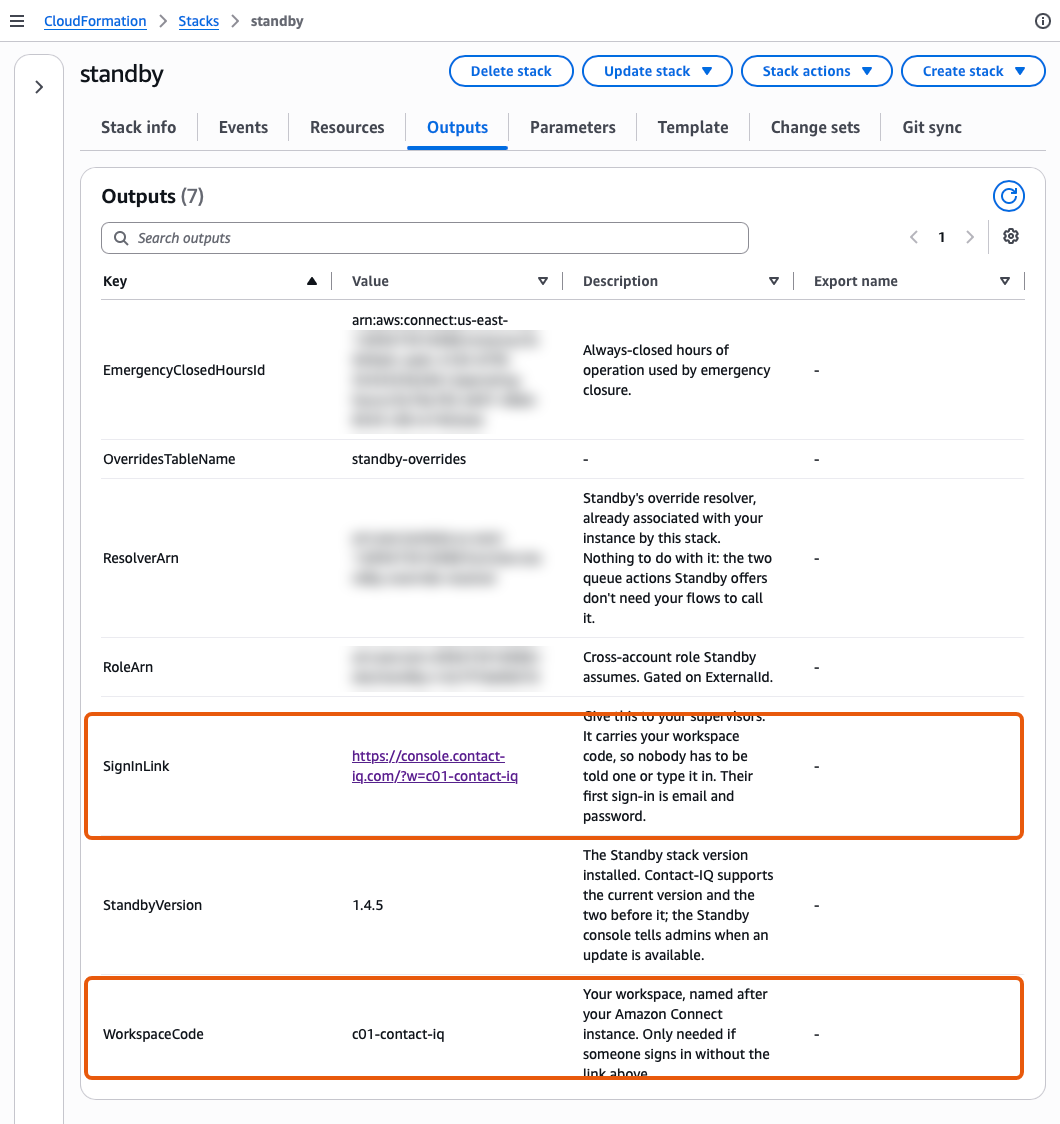
Open the stack's Outputs tab. SignInLink is the link to give your team; it carries your WorkspaceCode, so nobody has to type it.
-
The admin you named gets an email, "You've been invited to Standby", with a temporary password that works for 24 hours. Within a few minutes, queue figures start arriving, and in the Standby console the first step of Getting started ticks itself off.
Finding the stack later
To update or remove Standby, sign in to the same account and region, search the console for CloudFormation, and open Stacks → standby. See Updating the stack and Removing Standby.
What the stack creates
| Resource | What it's for |
|---|---|
A role Standby can assume, named standby-<your tenant ID> | Reads your instance's configuration and figures, and makes Standby's two time-limited queue changes. Only Standby's account can assume it, with an external ID unique to you. |
| A metric forwarder (Lambda, every minute) | Sends counts to Standby: contacts waiting, the longest wait, agent availability, service level and contact-flow errors. Never recordings, transcripts or caller details. |
A paging contact flow, standby-paging | What your on-call people hear when Standby rings them, and where they press 1 to accept. |
An always-closed hours of operation, standby-emergency-closed | Used only when someone closes a queue. Don't attach it to a queue yourself. |
| A small table and two Lambdas | Track what Standby changed so it can undo it, and report paging-call answers back to Standby. |